The Little Satellite That Could
11 April 2019You're reading the non-expert version of this post I wrote for people that don't have a technical background. If you would like to read the more technically in-depth version, click the expert button above.
You're reading the expert version of this post I wrote for people that do have a technical background. If you would like to read the less technically in-depth version, click the non-expert button above.
The undergraduate space engineering team I was a part of built a satellite for $4000 that acts as an artificial shooting star. EQUiSat is now alive and well in space!
Before I embark on this adventure of a post I’d like to thank the many people that made this possible: Tyler Fox, Ryan Izant, Lauren Haller, and Mckenna Cisler for answering many questions and reviewing this post; our awesome mentor Rick Fleeter, whose decades of space experience helped guide us and whose many friendly contacts answered our many questions; the Brown Engineering department, whose facilities and staff helped make this dream into reality; the University Sapienza of Rome for hosting one of our ground stations; the Rhode Island Space Grant, whose funds and support enabled our growth and success as a team; NASA, whose infrastructure and initiatives made all of this possible (and who can be thanked for the header image); NanoRacks, our integration provider; Mike Umbricht from the Ladd Observatory at Brown University who helped with our radio comms and Providence ground station; the HAM Radio community and Satnogs; and of course all of our sponsors, alumni, and friends who donated and otherwise helped to make this project possible.
One day in the fall of 2013, during my sophomore year in college, I was walking around the engineering building, and happened to look up at the TVs that played student and department announcements. I saw a call for students to join a growing engineering team and thought I’d go check it out. I was, unknowingly at the time, making one of the best decisions of my life. This is how I joined the Brown Space Engineering team, or BSE for short. What follows is the story of EQUiSat, our little satellite that could.
The MissionWhen I went to my first BSE general team meeting the following Sunday, the team wasn’t actually called BSE or even officially a team yet; until very recently they had just been a group of undergraduate students excited about space. They would get together once or twice a week to talk about what it would take for someone to one day theoretically build a satellite based on a class project of theirs. This class project was developed a few years prior by a group of engineering seniors, who came up with a (relatively) simple, but solid, idea for a satellite: an artificial shooting star that shines so brightly that it can be seen from the ground, with the goal of inspiring interstellar interest and testing a power system that could deliver a ton of power at once (LEDs you can see from space have to be very bright). They filed an application with NASA to get a ride to space, and the project appealed to NASA’s education mission so much that we were granted one!
Applying For LaunchWhen I joined, the group had just received word that they were one of the few student applications chosen by NASA for a free launch as part of the ELaNa (Educational Launch of Nanosatellites) missions. ELaNa is a NASA program that encourages students to develop space engineering skills by giving them access to real space launches, so their work can actually see the stars. However, because they are launching on real rockets contracted by NASA, this means that the student works are held to the same high standards that NASA has for their other space launches. What was once a fun senior project was now slated to be strapped to a rocket aimed hundreds of kilometers above our heads, where the satellite would then need to endure the brutality of space while completing its mission.
As of 2019, 85 CubeSats have been flown on 22 different ELaNa missions, with 36 more CubeSats scheduled for flight. These include many college projects and even a high school and an elementary school satellite! Often times these CubeSats hitch a ride to space by sharing a rocket launch alongside a government mission, but NASA has recently been looking into utilizing new CubeSat launch companies to also fulfill standalone missions. The satellites often conduct science in space or demonstrate a new technology; ours involves some of the latter, but also appeals to NASA’s educational side by inspiring people around the world to look up at the stars and get interested in space (on a budget)!
While the ground-visible LEDs fulfilled NASA’s education and outreach missions, our design also included a type of battery that NASA had never tested in space before: Lithium Iron Phosphate (LiFePO4) batteries. These batteries are able to power high current circuits and, while research said they would almost certainly work in space, people wanted us to try them first before they put them into any of their multi-million dollar missions. Thus our primary mission was to increase accessibility to space using a low budget satellite (under $5000), and our secondary objective was to test the LiFePO4 batteries for NASA.
CubeSatsBefore talking about any more details of the satellite, I should probably introduce the concept of a CubeSat. According to NASA, “CubeSats are a class of nanosatellites that use a standard size and form factor.” The CubeSat standard was created in 1999 and has become increasingly popular for many areas of space. People seem to think they are quite small compared to how large they think a satellite normally is, with a single CubeSat measuring 10x10x10 cm (~4 inch cube). This tissue box-sized cube is also called a 1U CubeSat, or a one unit CubeSat. However, satellite engineers often need larger sizes in order to accommodate various sensors and instruments, so the CubeSat standard allows engineers to build them in various multiples of units like in the image below)
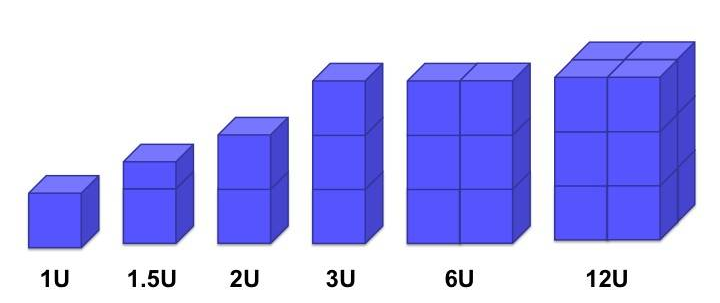
Image Credit NASA.
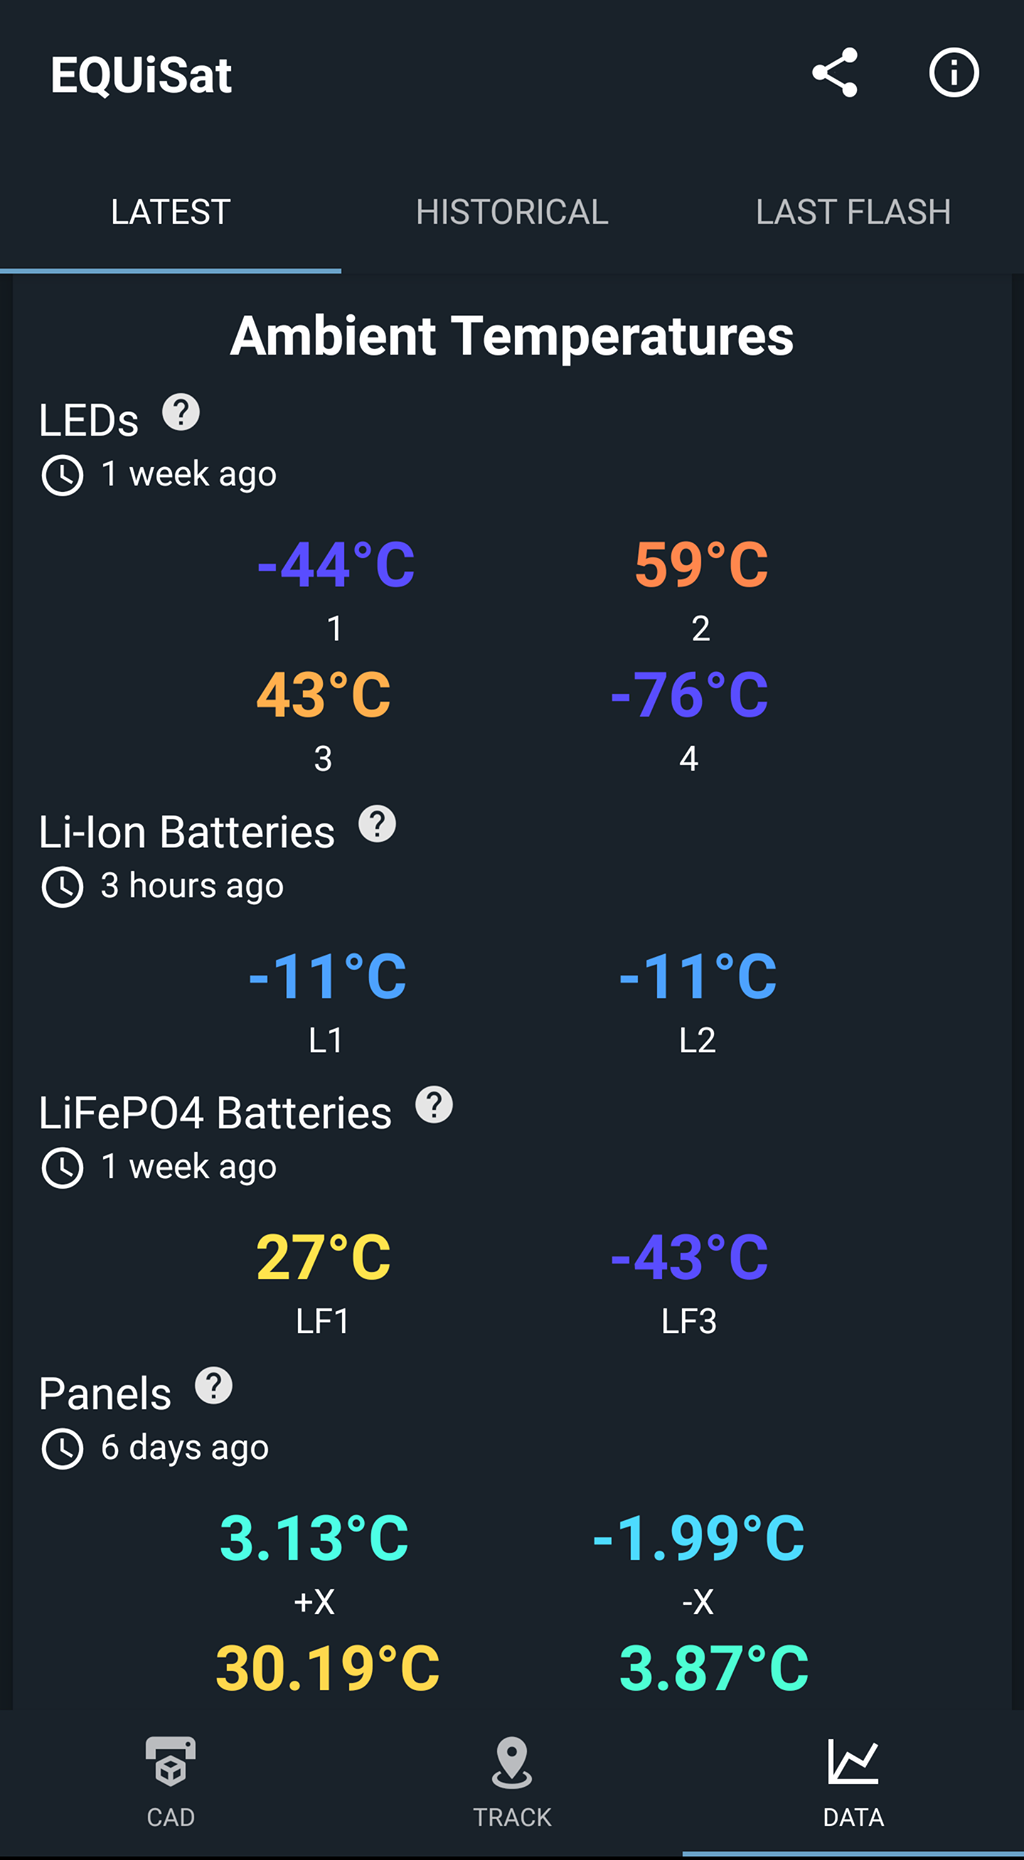
Our satellite fits the 1U CubeSat standard. Five sides are solar panels and the sixth has a panel of LEDs that flash bright enough to be seen with the naked eye from the ground. The inside of the cube is made up of mostly electronics that handle charging the batteries, flashing the LEDs, collecting data, and talking to Earth. As seen below in the screenshot of our website’s data dashboard, we record lots of data, including:
- temperature of the satellite and LEDs
- battery charge
- amount of sunlight on each side of the satellite
- magnetic field data
- acceleration and orientation values
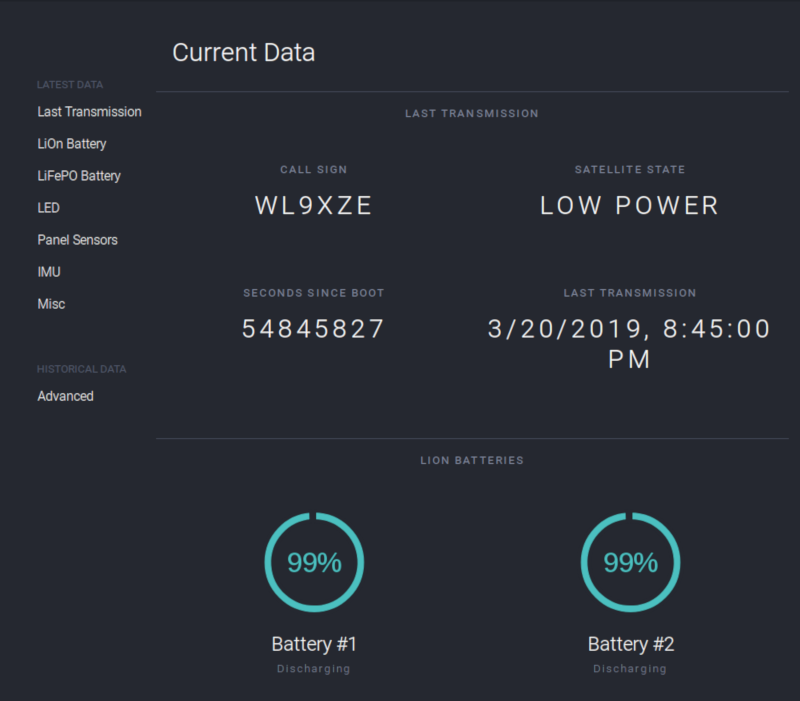
A screenshot from our data dashboard site.
Some great summaries of recent contributions and advances with CubeSats can be found in this NYTimes article and this NPR article which describe the use of CubeSats to relay data during the descent of the landing of the NASA Mars InSight probe.
All in all, the bill of materials for our 10cm cube came out to $3,776.61, not including labor of course. This cost does not factor in the launch, which would likely have been around $85,000; thank you NASA! Nonetheless, it is quite a low cost for the satellite; a typical CubeSat of similar complexity usually starts at $30,000 when buying the parts from a vendor. We were able to save a great deal of money thanks to three main strategies: using off the shelf components, manufacturing the satellite ourselves, and by using a passive attitude control system. By using regular electronics components off the shelf that were not guaranteed to be rated for use in outer space, we could get them cheaper, and then check ourselves to make sure there would not be any problems. For example, we used many small scrap pieces of solar panels which together work as well as a single panel. You can see in the picture below how there is an arrangement of many small solar panel pieces instead of one large cell per side like satellites typically have; each piece is the corner of a square they cut circular solar panels out of, resulting in a much cheaper price.
Building the SatelliteSuccessfully coated a side panel today! pic.twitter.com/rtuAIRTs2N
— BSE (@BrownCubeSat) March 6, 2016
Once we had the launch contract with NASA, all we had to do was put the satellite together. Easy, right? While relatively simple compared to some of the space stunts NASA can pull off, it took us about 4 years of engineering and manufacturing to get to the final satellite. Even though we had been theorizing about the mission and had some preliminary design plans in place before this, we still went through several major revisions of everything, from the solar panels to the main computer components. All of this work was done in various labs, shops, and classrooms in the Brown engineering building throughout our undergraduate careers there. During this process we all learned a great deal about space engineering, including just how many things we take for granted sitting down here on Earth with a big cushy atmosphere above our heads.
We're teaching team members how to make solar panels today! #soldering101 pic.twitter.com/pT1kR5V9pP
— BSE (@BrownCubeSat) March 7, 2014
Check out this time-lapse video of us machining one side of the #EQUiSat chassis! pic.twitter.com/nQkKzFwvhA
— BSE (@BrownCubeSat) September 18, 2017
The first of these Earth-bound assumptions is that the air keeps the temperature we experience fairly constant and constrained. However, while in orbit our small satellite experiences temperatures ranging from -30°C to 50°C (-22°F to 122°F), depending on how much sunlight is shining on it. We did several experiments to test our temperature sensors, including leaving it out in the (cold, but admittedly not as cold as space) Providence winter weather for long durations and putting it in my dorm room fridge (as seen below).
Electronics team being resourceful. Testing the temperature sensor in a dorm freezer. #Official #ThisIsHowNASADoesIt pic.twitter.com/ufpC7O0teu
— BSE (@BrownCubeSat) October 26, 2015
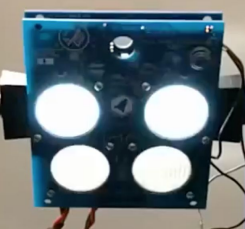
The LEDs on the satellite also heat up considerably when flashing. While this heat can dissipate into the atmosphere on Earth, we aren’t afforded this luxury in the vacuum of space. This meant we had to be careful to ensure the heat from the LEDs didn’t travel through the metal pieces of the satellite to places where it could melt our electronics. To address this issue, we had to use a special coating on the backs of the LEDs so that the heat would flow into the satellite chassis, not the circuits powering the lights. Moreover, we ran into another heat issue while testing flashing the LEDs for the first time; the test stand we had 3D printed to keep them upright quickly melted after we turned on the LEDs, forcing us to design a sturdier flash test apparatus.
First integration test flashing 2/4 LEDs with flight hardware! pic.twitter.com/BuVUUjnXge
— BSE (@BrownCubeSat) March 25, 2017
The second challenge that we were required to address during this process is radiation. While satellites in Low Earth Orbit (LEO) like ours don’t experience as much radiation as communication satellites in Geosynchronous Orbit (GEO), it can still interfere with the electronics onboard (for reference, LEO is ~400km and GEO is ~35,000km up). Radiation interference can happen when high energy particles pass through the satellite and hit its computer chips, which can corrupt the code stored onboard. To protect against this, we included two small pieces of radiation-resilient memory (MRAM), which store a copy of all the satellite code and important constants like the number of seconds since boot. Now, if we detect any errors, we can reboot and reload the uncorrupted copy of the code from the MRAM.
Next, we had to address what I believe is one of the more interesting issues of space engineering: selecting parts that will withstand the effects of the vacuum of space. In space, we can’t rely on having a constant ~1atm of pressure to keep everything together, something that we typically take for granted sitting under so many kilometers of atmosphere. Putting parts into a vacuum that are not designed for these conditions can lead to what is called outgassing, where any air inside the part causes it to explode because there is no longer any air outside to keep it in. Because of this, we had to specially select LEDs that would work in space, being careful that there were not any small pockets of air inside them that could be leftover from when it was molded. If there were any leftover air, our LED panel could have turned into a shrapnel bomb. We also had to make sure the coatings we put on our solar panels didn’t have bubbles in them for the same reason. We were able to test some of this in a small vacuum chamber we had in the Brown engineering building, seen below. An additional precaution we took in order to prevent EQUiSat from generating space debris was using Locite, a thread locking paste, on the screws to make sure they couldn’t vibrate loose on the bumpy ride up.
Exploded view of the 'flash sandwich' made up of our flash panel and LED driver board! #delicious pic.twitter.com/MKAg4Iv7uO
— BSE (@BrownCubeSat) June 23, 2016
Testing EQUiSat's batteries in the vacuum chamber! #NoPressure pic.twitter.com/S9Nmj3H0Hn
— BSE (@BrownCubeSat) September 11, 2017
Finally, another amusing problem we faced is one that I had always overlooked when thinking about how things got up to space. When launching a satellite to orbit, I typically thought of how it sat atop a rocket, the rocket taking off, letting go of the satellite at the right time, and then the rocket falling back to Earth (or landing)! But once it’s been thrown out into space, how does the satellite actually know what direction to point in? CubeSats especially are usually somewhat crudely pushed out of the side of a rocket (or space station), and are thus tumbling rapidly upon ejection. It turns out that orienting the satellite can be a pretty hard problem, one that more expensive satellites accomplish with systems of reaction wheels or small jets of gas. We ended up using a much simpler solution involving magnets to align ourselves with the magnetic field of the Earth. Using some magical physics, when the CubeSat is spinning the magnets move through the magnetic field of the Earth and slow down the spin of the satellite, guiding it to an angle parallel to the magnetic field lines of the Earth. Thus, the satellite will be pointing towards the planet while over the northern hemisphere! See the great explanation on our website for more info.
In the end we were able to make a fully fledged CubeSat in time to hand off to NASA, so they could load it into a resupply capsule headed for the International Space Station. It looked almost exactly like the CAD model below, and you can check out the interactive CAD model on our website or mobile app.
In the end we were able to make a fully fledged CubeSat in time to hand off to NASA, so they could load it into a resupply capsule headed for the International Space Station. You can check out the interactive CAD model on our website or mobile app.
A CAD model of EQUiSat.
While this technical work was going on we had also been fulfilling the other huge part of our mission: the educational outreach objectives. For years we have had groups of team members go to elementary schools around Providence and give lessons on engineering, physics, and space to the students. We’re hoping that this teaching in combination with our successes in orbit can help inspire the next generation of space engineers!
The LaunchBefore we put our satellite on board any rocket to space, we had to first make sure that it would survive the journey into orbit. Riding to space on a rocket basically amounts to sitting in a box on top of a somewhat controlled explosion ripping through a turbulent atmosphere, so things tend to get bumpy onboard. We had done some basic tests ourselves, but with much less rigorous equipment than what professionals use to space certify satellites. We were fortunate enough to have some amazing volunteers at UTC Aerospace give their time and equipment so we could do vibration testing; this testing alone usually costs a CubeSat $7,000 (space is expensive)! EQUiSat passed the first time around, so it was time to put it on the rocket and send it to the stars; the question was, which rocket?
EQUiSat passed its fit check with @NanoRacks! Now on to vibe testing 🚀 pic.twitter.com/2R0GNKNvoC
— BSE (@BrownCubeSat) March 7, 2018
We are excited to announce that #EQUiSat successfully completed vibe testing with full functionality. Hardware is all clear for launch to the International Space Station on May 1st! 🛰️ Big thanks to @UTCAeroSystems and @NanoRacks pic.twitter.com/b3cdCMR7sg
— BSE (@BrownCubeSat) March 8, 2018
Previously, I mentioned that NASA had given us a spot on a launch to space, but we didn’t yet know which launch we would be on or to which orbit we would get. In 2015, NASA began asking us if we wanted to go up on specific launches that would put us in an orbit close to the ones we requested; the catch was that we could only decline so many times before being put to the back of the education launch queue, so we had to carefully consider each launch. We needed to make sure that we would have enough time to finish the satellite before the launch, so we had to start focusing more on our making our progress projections accurate. We also had to check that we would be in an orbit low enough where the satellite would be visible, but high enough that it would stay up for a while before the orbit decayed enough to cause our satellite to burn up in the atmosphere. Satellites in orbit can start to lose altitude because the Earth’s atmosphere slows them down bit by bit over time. Contrary to popular belief, the gases of the Earth’s atmosphere don’t have a hard border where they stop and space starts; even several hundred kilometers up there are very faint, but noticeable, wafts of the atmosphere!
Originally, we had agreed to fly aboard the inaugural flight of a space startup’s orbital rocket. I was personally nervous about being on board any first orbital launch, because if there’s one thing I’ve learned with my exposure to space engineering, it’s that space is hard. I didn’t have to worry for long though. Soon after we accepted, the company ran into legal issues which prevented them from launching. Thankfully, NASA quickly told us not to worry and that we would still be given a ride to space. We then accepted a spot in a resupply mission to the International Space Station launched by Orbital ATK (now Northrop Grumman Innovation Systems); we would be a part of the OA-9 mission, on an Antares rocket with a Cygnus capsule launching out of Wallops Flight Facility in Virginia. EQUiSat was integrated by NanoRacks, which means they were the ones that actually put our satellite in the ISS resupply pod alongside all the other science experiments and supplies.
We were so excited; real astronauts were going to touch our satellite (well, the NanoRacks satellite pod our satellite was in)! On the ISS! CubeSats are regularly deployed from the ISS in a manner that I like to say is akin to the astronauts throwing them out the window. In reality it is actually only slightly more sophisticated than that. The astronauts have a slot in their busy science schedules allocated to taking the satellites out of the resupply capsule, loading them into the NanoRacks CubeSat Deployer (which is a tube with all the satellites in a line), and pushing the button that spring shoots them into space. Remember that because the satellites conform to the CubeSat standard, they can all fit in the same sized tube next to each other, making this path to space possible. The CubeSats also all have separation springs between them in this tube, so that when they are released into space they don’t bump into each other (you can see them pushing apart in the Tweet of the deployment further down).
There was one thing we had to be careful of now that humans were helping launch our satellite, however; because EQUiSat is supposed to shine bright enough to be visible in space from the Earth, we had to be extra cautious not to flash while any astronauts were nearby. As blinding the ISS crew would likely create an international crisis, we were designated as a “Catastrophic Ocular Hazard” by NASA. This was tricky to deal with. Because there were not any physical switches that were both capable of handling the current flowing to the LEDs and also small enough to fit into the satellite, we had to resort to a combination of hardware and software to mitigate this hazard. We wrote our software so that it could not flash the LEDs until the batteries reached a certain voltage; this could not happen until the satellite had been in space for a while, thus far enough away from the ISS such that the astronauts would be safe from our flashing.
In March 2018, we handed off our satellite to NASA by flying it down to NanoRack’s office in Houston. We made sure to let the TSA know ahead of time what we were bringing by showing them a letter from our launch provider, NanoRacks, and some of our schematics and CAD drawings. The ELaNa 23 mission we were a part of was among other science and ISS resupply objectives for the launch; the other CubeSats next to ours were CubeRRT, HaloSat, MemSat, RadSat-g, RainCube, TEMPEST-D, EnduroSat, and Radix. A funny coincidence we realized is that one of the people who built another satellite in our launch actually had our adviser as a professor in the past. Small world! At that point, the fate of our little cube was out of our hands, or so we thought.
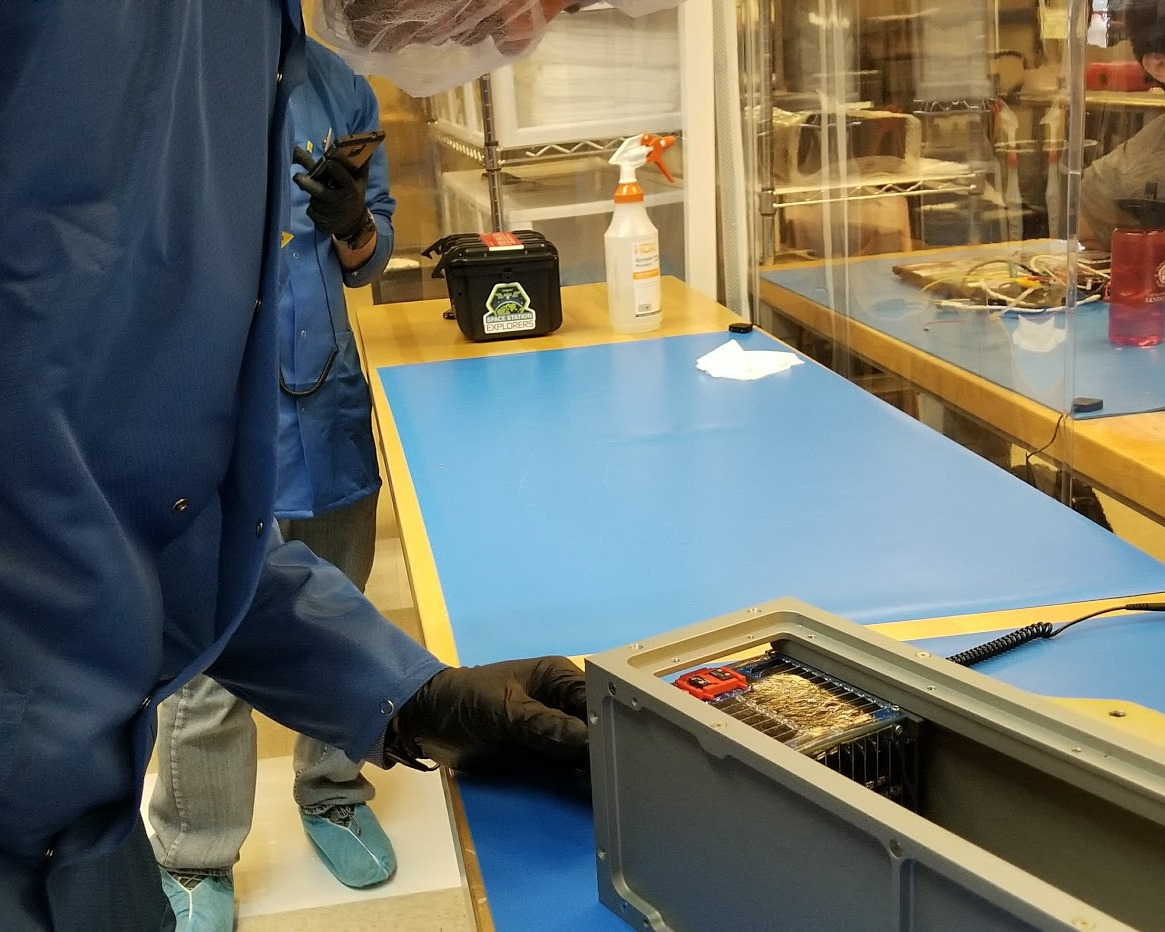
Transporting EQUiSat down to Houston to hand off to NanoRacks to be integrated into the CubeSat launcher. Pic credits to Hunter Ray.
EQUiSat is loaded up and ready to go! Next stop, the ISS!! pic.twitter.com/DPAN0eUEwo
— BSE (@BrownCubeSat) March 20, 2018
A few weeks after we delivered EQUiSat, one of our engineers realized that had been leaving out a code feature when running the satellite program through our system tests. When we reran our tests with the correct version of the code, we realized there was a glitch that rebooted the satellite after flashing. While this would not kill the mission, it could potentially introduce issues if the system rebooted before transmitting all its data. Fortunately, NanoRacks let two of our software engineers fly down to Houston to load a last minute software patch into the satellite. This was very generous of them, because all the other satellites had already been spring loaded into the launcher rack next to ours and people are rightfully nervous of the most minor adjustments when it comes to space. In the end, we were approved because we only had to plug in a programming cable, so none of the other satellites would be disturbed. Nothing like this had happened before with their deployments, so they were optimistic the approval for our case would set a precedent for future software-only updates. After this small crisis was averted, the satellite was actually out of our hands. Our satellite and the rest of the CubeSats in the NanoRacks deployer were put inside the ISS resupply capsule, and then placed in the Cygnus capsule on top of the Orbital ATK Antares rocket.

Some of our software team flying down to Houston and issuing the last minute patch. Pic credits to Tyler Fox.
The rocket was launching out of Wallops Flight Facility in Wallops Island, Virginia. Rocket launch sites like this are located along the coast so that the launches can go out over the ocean, away from any population centers in case something goes wrong.

Google Maps screenshot of Wallops.
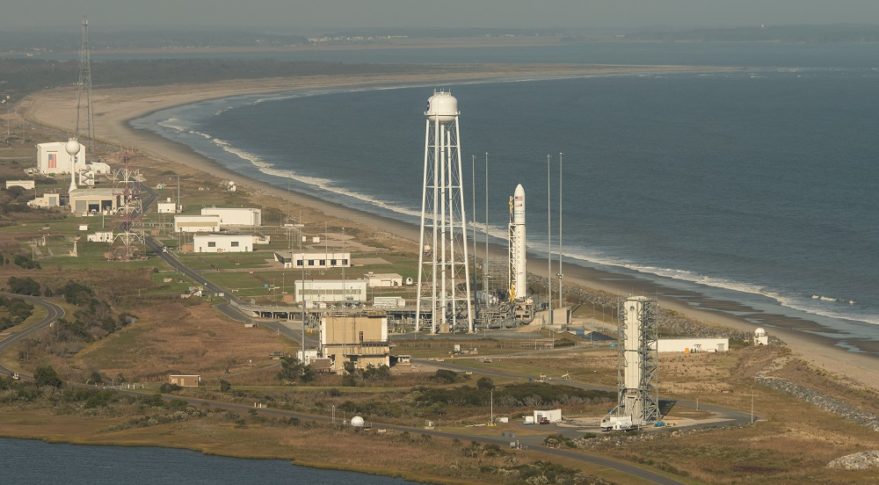
Orbital ATK's Antares rocket at Wallops. Image Credit: NASA/Bill Ingalls.
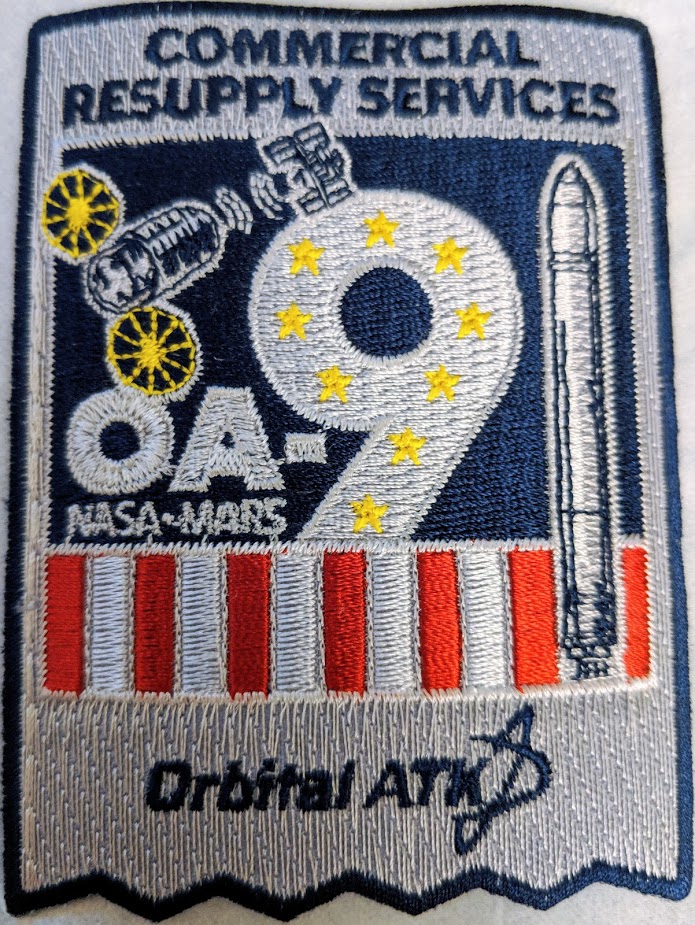
ISS Commercial Resupply Services 9 mission patch.
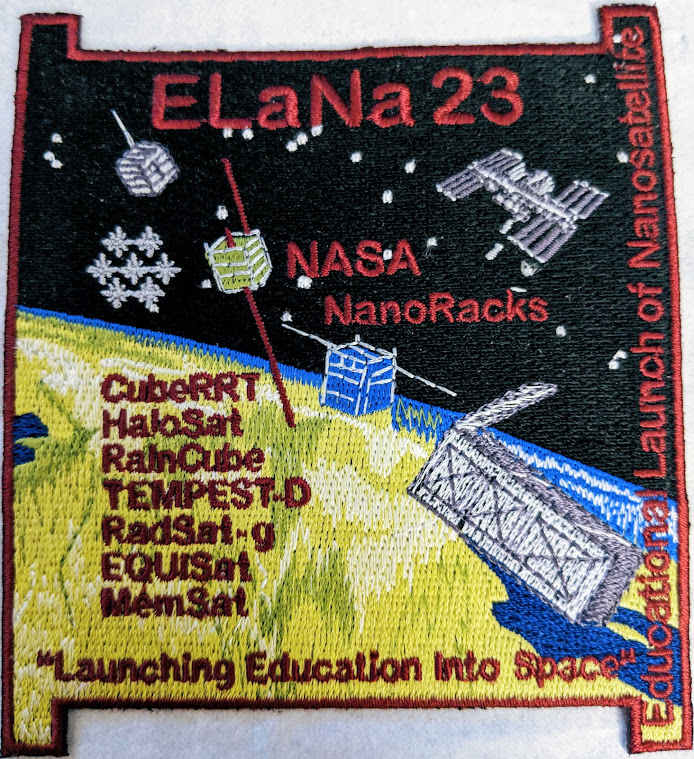
ELaNa 23 mission patch.
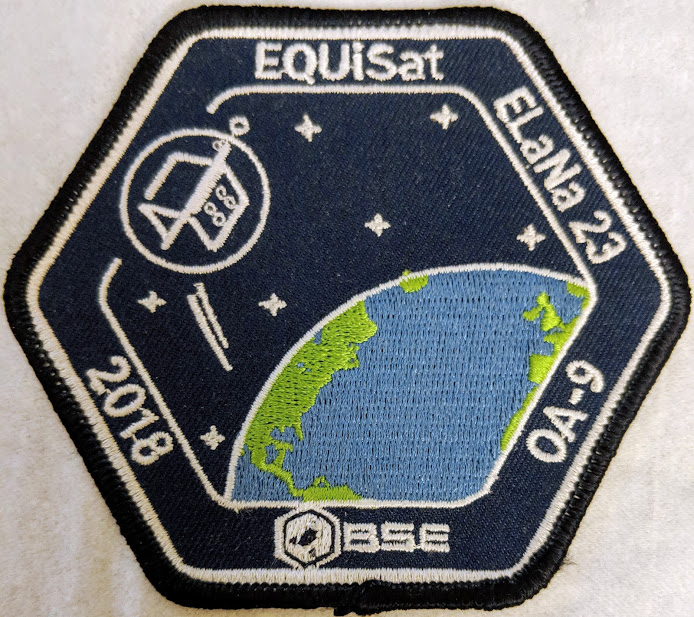
EQUiSat mission patch.
The team and many years worth of alumni drove down to the site in Virginia to see the launch. It was amazing to have the founding members of the project, the current freshmen on the team, and everyone in between in the same place for the first time, seeing the cube we had been working on for so many years finally go to space. The launch was scheduled for 4:39am, so many of us tried to sleep for a few hours that night, while others were unable to at all due to excitement or nervousness. We had a reason to be nervous though, because a key detail of the launch was that there was only a 5 minute window starting at 4:39am during which the rocket could takeoff and make it to the ISS. If it got delayed more than that then the launch would be ‘scrubbed’ and be back at least another day. The issue was that few, if any, of us would have been able to stay in Virginia until then. Launches can get delayed due to bad weather, anomalous sensor readings, or issues with the launch site, sometimes as trivial as someone in a boat getting too close. All of this can happen up until T-0 seconds to liftoff, so we were on the edge of our seats the entire time.
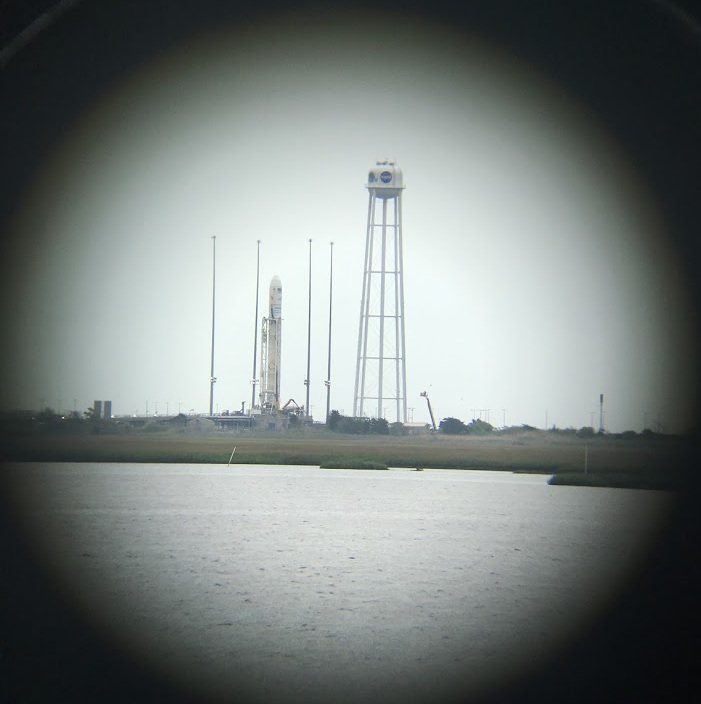
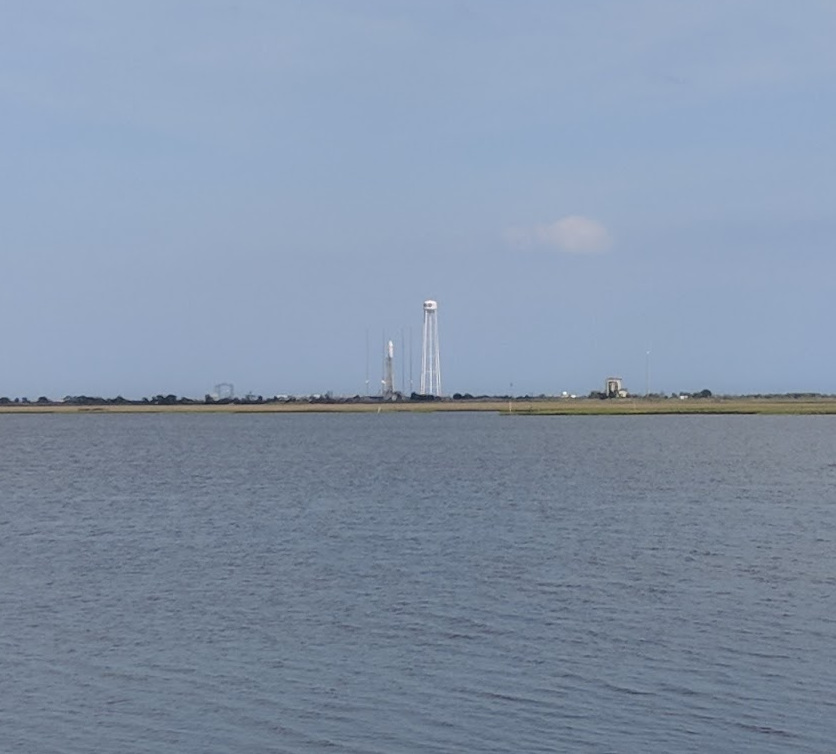
Orbital ATK Antares rocket with EQUiSat on top the day before the launch. Pic credits to Hannah Varner, Tyler Fox.
We had a very good viewing position because the neighborhood we stayed in happened to be on the coast across from the launch site with a clear line of site between a nearby cul de sac and the rocket several miles away. At around 4:00am we all began to head down the street to get in position and set up some cameras, alongside several other groups of space enthusiasts that were also there to watch the launch. I was constantly refreshing the Twitter feed of Orbital ATK checking for updates, dreading a tweet saying they were scrubbing the launch. The weather was questionable and we were all unsure if it would hold up long enough to get the rocket to space. Orbital was saying all systems green on their Twitter feed, but then around 4:14am they said they were pushing the launch to the latest allowed by the launch window, 4:44am, to hold out for the best weather conditions possible.
We are now targeting the end of the launch window at 4:44 am due to weather constraints. #OA9
— Orbital ATK (@OrbitalATK) May 21, 2018
We are GO for launch! Go #Antares! Go #Cygnus! #OA9 🚀
— Orbital ATK (@OrbitalATK) May 21, 2018
4:39am came and went, and we were frantically checking any and all sources of information about the launch. On pins and needles we celebrated the arrival of 4:43am, T-60 seconds to liftoff, without any cancellation notifications. Then T-30. Then T-10, 9, 8, … T-0.
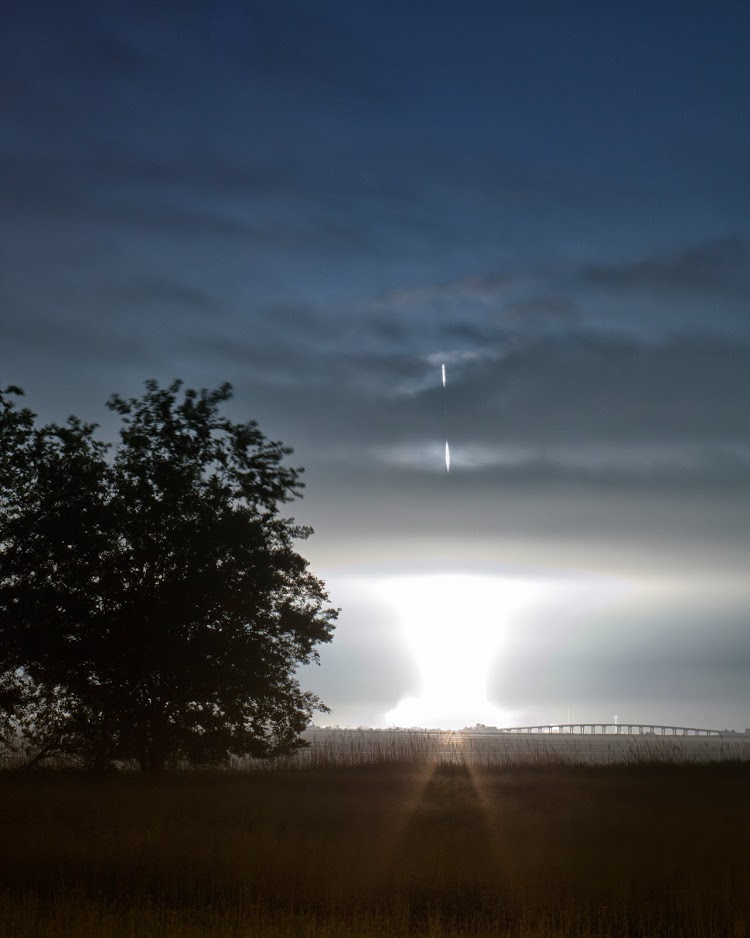
Orbital ATK Antares rocket lift-off with EQUiSat onboard, from our view on the shore. Pic credit to Mckenna Cisler.
The
liftoff
was
awesome.
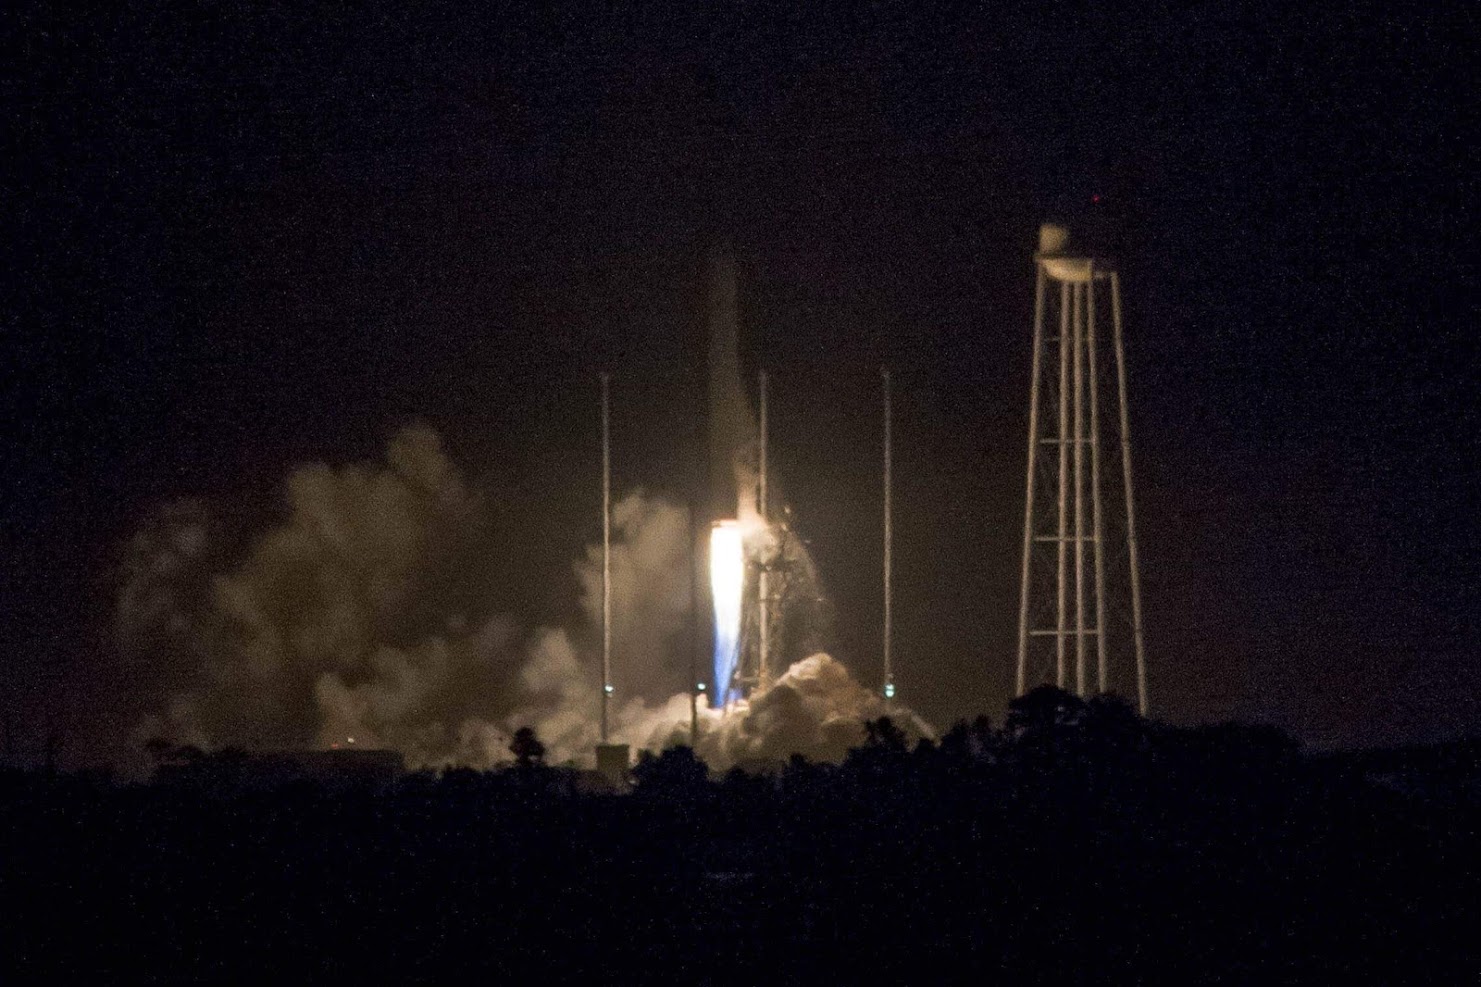
Orbital ATK Antares rocket lifting off with EQUiSat on top. Pic credits to Hannah Varner, Max Monn.
I mean that in the literal sense of the word; it was one of the most awe-inspiring things I’d ever seen. The entire night sky lit up with the flames from the engines, and the building-sized rocket started to lift into the sky. It briefly went behind some low-hanging clouds, temporarily putting a diffusing lampshade on the upside down candle hurtling through the sky. We actually couldn’t hear it until several seconds after launch, at which point the crackling roar arrived to announce itself as the auditory embodiment of raw power.
And then, almost as quickly as it started turning the night sky into day, the rocket was out of sight. We could still hear it for a while, as the light from it faded to look like a star and then disappear altogether. A common misconception people have about space is that the rocket’s only job is to just lift the payload up high; the rocket’s primary job is really to accelerate it extremely quickly sideways so it can reach orbital speed (~7.8km/s or ~17,448mph)! This meant that our satellite was quickly disappearing into the sky out over the Atlantic, leaving us behind on Earth. After our cheering subsided, we took a moment as a team to reflect on everything we’d just accomplished (with our adviser Rick Fleeter on speakerphone from Rome where he was helping get our other ground station set up); something our team had designed and built was now accelerating to speeds we can’t even imagine en route to the ISS. Something made during our (lack of) free time, borne entirely by undergraduates turned first-time space engineers, driven by our desire to make it to space.
Life in ~~~ S P A C E ~~~The Antares rocket with EQUiSat onboard lifted off on May 21, 2018, and after about three days, the Cygnus resupply capsule made it to the ISS. While they could shoot the capsule straight to the space station, any small errors in sensor measurements or offsets in trajectory on the intense ride up could lead to a catastrophe if the capsule comes in too fast or off course. Instead, they launch it into an orbit where it can slowly and carefully maneuver itself to match up with the ISS.
After transiting #Australia & the atolls of #Indonesia, @OrbitalATK #Cygnus arrives to @Space_Station carrying science & supplies to our outpost in space. pic.twitter.com/m7WK7jVH9s
— Ricky Arnold (@astro_ricky) May 24, 2018
Our satellite is in that supply capsule in the picture above! Once it docks, the astronauts have to check that all its contents are still in shape; thankfully, ours was. We were told that it would be sometime in late June or early July that the astronauts would be scheduled to release it into space. Finally, on July 13, 2018, EQUiSatit, along with the rest of the other CubeSats that went up in the tube alongside it, was shot out of the ISS using the NanoRacks deployer via the JEM airlock, positioned via the JEMRMS robotic arm.
— BSE (@BrownCubeSat) July 24, 2018
In order to listen for any word from EQUiSat, our team setup two ground radio stations: one in Providence at our university’s Ladd Observatory, and the other at Sapienza University of Rome, where our adviser spends half his year teaching. In addition to this, we released instructions on our website for HAM radio operators to listen in and see any data we transmit, which you can find here. We also have an awesome decoder site where you can upload your own recorded transmissions for us to decode!
After being released into the void, EQUiSat tumbled around in orbit for 7 hours until we made initial radio contact with it via our ground station in Rome. We were ecstatic! Our project was broadcasting to the world, and it’s system status was “HELLO_WORLD” like we expected (in this case it is both a joke on the programming trope of “hello world” being the first thing you code, and literally saying hello to the world). As the data came in we started figuring out exactly what our little satellite was doing; it went through the startup sequence as we planned, and eventually went into IDLE_NO_FLASH mode, which meant it was waiting for the batteries to have enough charge to flash. And then, after 12, days on July 25th, we got this data back:
EQUiSat has started flashing its LEDs and we've received the first flash data! To find out how you can best try and spot EQUiSat in the sky this summer, read here: https://t.co/Bd7Tfg0a1B pic.twitter.com/Wc72YuM9zd
— BSE (@BrownCubeSat) July 26, 2018
What you’re seeing with the yellow and blue curves are a huge increase in the power being drawn (with 4 batteries at 6.5 amps each that’s 26 amps total!) by the LEDs, meaning the satellite flashed for the first time! This was confirmation that the primary technical achievement of our satellite was working; hopefully soon we will be able to get a video of it blinking in the night sky. If you want to get a notification about when EQUiSat will fly over you or check out its current position and radio transmissions, download our Android app here or iOS app here; they are very well done and I’m super proud of the team for putting them together so nicely.
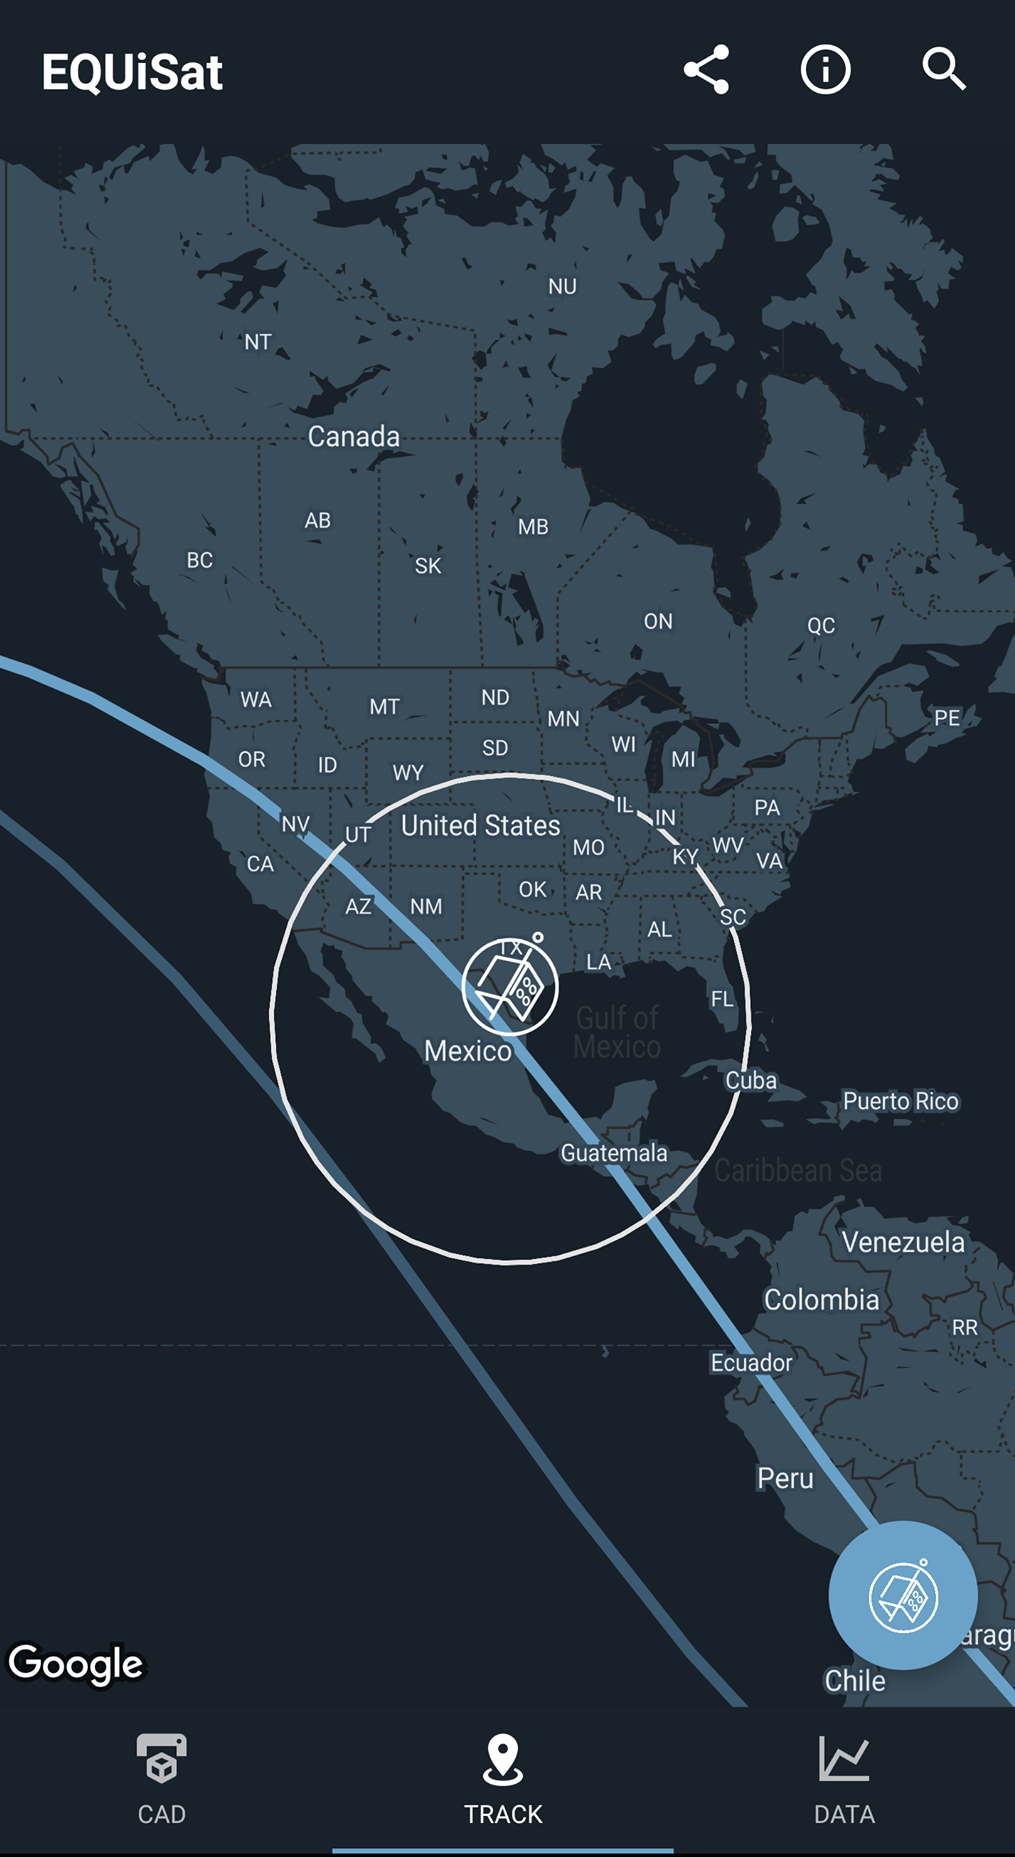
Some screenshots of our awesome app.
As I write this, our little satellite that could is flying across Botswana going about 7.654km/s (17,000 mph) at an altitude of 406.11km above the Earth. It won’t be in Africa for long though because it’s moving so fast. There was one night I wanted to go outside my Boston apartment and look up when it was in the area (I was doing it more for symbolic reasons, as the city light pollution would likely drown out the flash, although it should be visible from the suburbs). I checked the app and EQUiSat was currently over New Zealand; just half an hour later it was passing by me in New England. Following its position on the app as it zipped across all the states in the Northeast made me really appreciate just how fast things are moving in space. Few of us have ever experienced anything moving even a fraction that speed!
So currently (as of April 2019 at least) EQUiSat has launched and deployed successfully, been alive in orbit for almost eight months (!), sent us data via radio, and is flashing. The only thing still missing is a visual recording of its flashes. For the last few months of 2018, EQUiSat was conserving power and not flashing as often as usual because its orbit drifted such that it spent more time in the night side of the planet. While frustrating for trying to get videos of it flashing, it is a good demonstration of our software logic! Plus it should be in orbit for 12-18 months so we still have time to see it. I’ll update this post when we either get footage of it flashing or have any new developments. In the meantime check out this guide to try to see it for yourself!
EQUiSat's health is quickly improving as it enters a season of peak sun exposure! The voltage and temperature of its batteries just hit their highest point in 3 months, and it's possible that EQUiSat will begin flashing again in the next two weeks. Keep an eye out for updates! pic.twitter.com/VAcGQ83FgW
— BSE (@BrownCubeSat) December 15, 2018
I highly recommend you to checkout our Twitter that I've been linking to throughout this post, website, and/or download our app (Android, iOS), so you can see all this cool work we’ve done in person! Once again I’d like to thank everyone involved with this project. It has truly been one of the coolest things I’ve done and it wouldn’t have been possible without a team-wide effort. Right now the roughly 50 person BSE team is busy designing the next satellite they'll be putting in space; I’m so excited to see what they accomplish! It’s definitely true when they say that space is hard, but we’ve shown that with enough perseverance and teamwork not even the sky is the limit.
I’m going to assume you’ve at least skimmed the other version for a background on the satellite and mission; if not, I recommend doing that first. While I’ll mainly be focusing on the details of the computer systems work we did, I recommend everyone take a look!
The System
For a brief technical overview of our satellite’s components and systems you can watch this video. The satellite’s electronics include the following:
- An Atmel SAMD21J18A processor, with a ARM Cortex-M0+ CPU clocked up to 48MHz
- 2 500KB chips of MRAM, which serve as a radiation resilient area where we store copies of important information like our program code, errors, and the satellite time (we duplicated data across both chips for redundancy)
- 6 IR sensors and 6 photodiodes, one on each face of the CubeSat
- An inertial measurement unit (IMU), consisting of a gyroscope, magnetometer, and accelerometer
- A temperature sensor for the radio, IMU, each of the 4 LEDs, and 4 of our 6 batteries
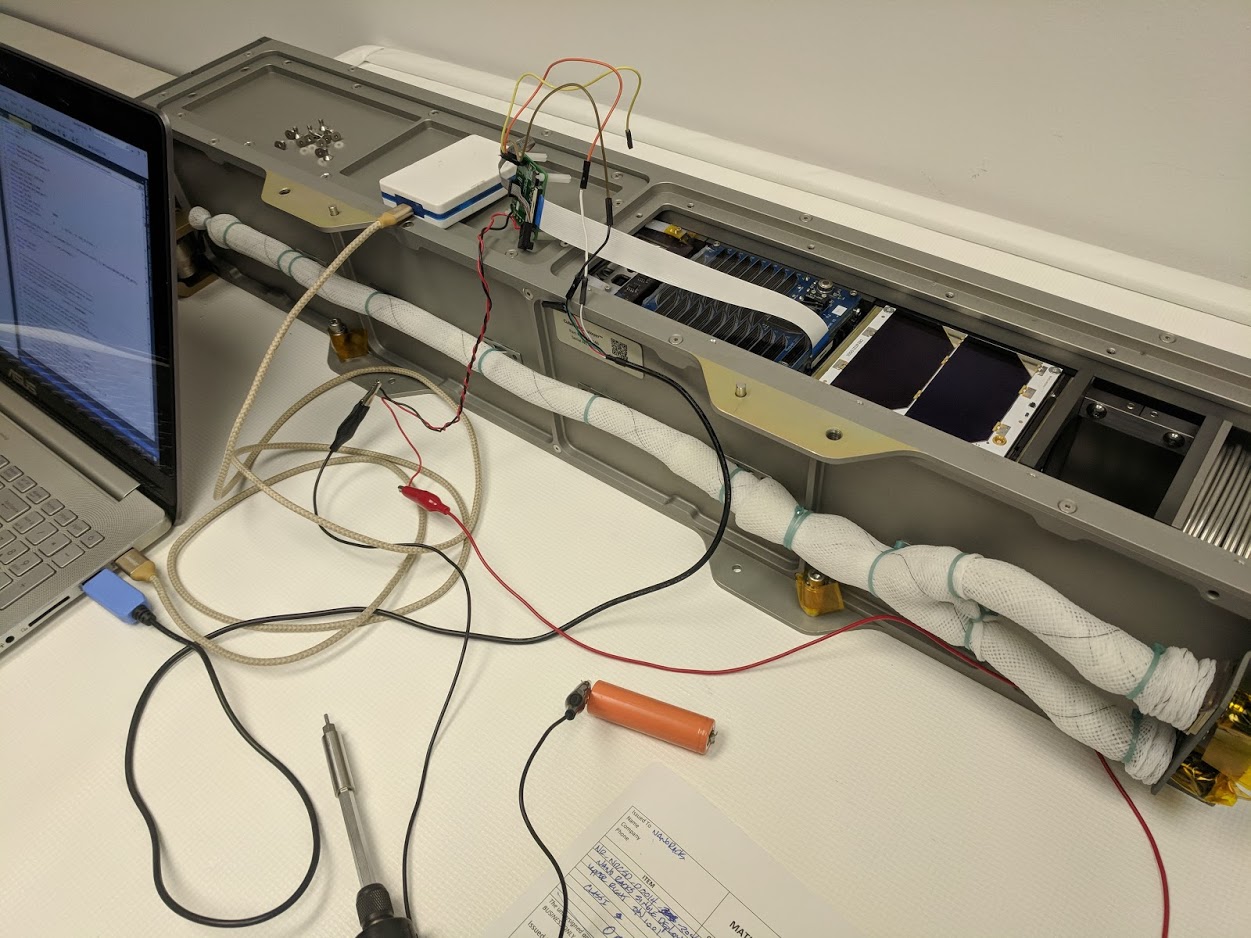
For more information see our software page and technical docs. We talk to these components via I2C, SPI, USART, GPIO, and PWM to gather their values so we can make decisions about when to flash, deploy antennas, and perform other operations before sending the data to the radio to be beamed down to Earth. While I think programming hardware is very satisfying once you get it actually working, this experience was a reminder of all the pains hardware can add to regular software debugging. Between messing up our test circuit designs, dead-on-arrival circuit boards, or blowing up components, there was no shortage of issues to go through with the avionics. All of this was complicated by the fact that we did not have a permanent workspace during the initial stages of development; we were forced to be scrappy and work in the open electronics lab at Brown. This meant we had to set up and put away all our components every time, which was time consuming and introduced additional room for error. Eventually, we were given our own space. This was a huge help, dramatically increasing our efficiency and allowing us to perform long-running tests. I highly recommend it to any other teams!
To see the satellite CAD files you can check out this link, and here are all the EAGLE files for the various PCBs in the system. Keeping our CAD models up to date was important to make sure everything fit together; with around 1500 parts, the final CAD renderings you see on our website took over an hour to generate! We were even able to automatically convert and import the PCB files into the CAD renderings so they look accurate. You can assign materials to all the pieces, so we could calculate the rough (excluding wires) center of mass to make sure the satellite was balanced. We also had to submit the CAD files to Nanoracks so they could check for interferences, especially with the radio antenna.
The CodeOur code was written in C and can be found here. We used FreeRTOS as the base OS for the satellite, which gave us a useful task scheduler and event loop. The satellite is a state machine with six states (INITIAL, ANTENNA DEPLOY, HELLO WORLD, IDLE FLASH, IDLE NO FLASH, LOW POWER), which we transition between for various events during the mission. We also almost included a GOODBYE/RIP state that would be entered when the satellite was about to die, causing it to rapidly transmit all the data it could while it was on its last legs. In the end, we removed this state because we didn’t think it served a useful enough purpose to warrant the potential risk that entering this state accidentally due to a false positive could cause. In short we opted for simplicity to minimize risk. For more details on these transitions, see the picture below. In general, we have a flow through the first three transient states from the initial boot to first radio transmit, and a flow between the last three states for when the satellite is fully booted and communicating in its ‘steady state’. The latter three states handle when we flash, with the transition logic centered on having normally charging batteries with sufficient voltage to power the LEDs.

Transition diagram for the satellite state machine.
One reality of space that we don’t have to deal with on the ground is ionizing radiation flipping bits and changing the values stored in memory. To combat this, we store critical values (the addresses of persistent memory locations, fields in the bootloader such as the MRAM processor pins, and the address of the satellite boot code) in triplicate. If any one of the three copies is different, then we assume the value the other two have is correct (all three being different is unlikely enough that we just give up in that mode and continue normally). We additionally have a system watchdog, which is a timer that checks every several seconds if we’ve called a function to “pet” the watchdog (i.e. reset the timer). If our program fails to call this function and the timer reaches 0, it triggers a hard system reset. Because we wrote the code to call it more frequently than the timeout, the timer reaching 0 implies that we haven’t arrived at that line in the code recently and something is wrong. In the event of a system reset, we check if there is any difference between the currently running code stored on the microcontroller and the copy of the program stored in radiation-safe MRAM. If there is a discrepancy, we overwrite the section of affected code with a fresh copy from the MRAM. Along with the rest of the satellite errors, these reset events are also logged in MRAM so they can be transmitted at the next downlink. This lets us know when the satellite had to recover from a single event upset (SEU). This method is not foolproof though, because the bootloader can still be corrupted and possibly result in an unbootable satellite. Nonetheless, this strategy significantly minimizes the risk, as the small size of the bootloader compared to the rest of the program reduces our vulnerable surface area, and should be sufficient given that we are only in LEO; it may not be if we sent EQUiSat somewhere more radiation-heavy like Jupiter. Maybe next time.
Between radio transmissions, we periodically store some data onboard the satellite so we can build up a buffer of historical data to transmit. We store this data in a custom data structure, affectionately named the EQUiStack, that is essentially a hybrid of a priority queue and a stack. This is to ensure that errors and more recent data can be popped off the stack to downlink first, but the oldest data in the queue is replaced first when we have new data to store. In order to be safe, we statically allocate all of our variables and data structures for storing the transmission data on boot, so we could rule out many types of memory issues .A general rule of embedded systems that are designed for stability is to never dynamically allocate memory. To do this, you define all variables and data structures as global variables so they are statically allocated and stored in the uninitialized and initialized memory sections below the heap. One can even consider how defining too many local variables in functions can cause the stack to grow large enough to collide with the heap, which can create a whole new set of problems. To be extra safe, we tuned our stack sizes to use any remaining memory. In the end, we intentionally consumed about 99% of our available memory, and all our software for running the satellite ended up fitting in ~110KB.
We also compiled the code with flags that minimize its size, with the idea of minimizing the code’s surface area to create a slightly smaller target for radiation to hit. This code size optimization was actually part of our last minute bug fix I mentioned before, where two of our teammates had to fly down to NanoRacks in Houston to apply a software patch while the satellite was in the P-Pod. Towards the end of our software development, we accidentally introduced a buffer out-of-bounds read which would cause the code to segfault when executed in a binary built with the code size optimization flag. Specifically, running a binary built with -OS would cause a read out of bounds bug to enter an infinite loop and eventually segfault, whereas -O0 or -O1 would just return some bad data. This segfault meant our program failed to pet the watchdog, which would cause the system to reboot. Our main issue was that our duplicated hardware testing environment compiled the code with a different set of flags than the ones we used to build the binary for the final satellite. Namely, we did not use the code size optimization flag in testing, and the code managed to avoid segfaulting without it. There are two key lessons to take away from this, which I’ve seen many times before and are now even more firmly cemented as necessary software principles: 1) make sure your test and production settings are the same, and 2) always test your code and binaries before you push to production (or to space)!
When designing the software we were always concerned with knowing exactly if and when the satellite encounters a failure, so we developed a long list of possible errors (which you can find here if interested!) This allows us to get the timestamp, error code, and satellite component that failed if/when we experience any of these!
The RadioIn order to talk to our satellite, we use an XDL Micro Transceiver from Pacific Crest Communications, transmitting at 435.55 MHz. To our knowledge, this is the first time that this transceiver has been used in space (the manufacturer even told us it may not work, but we tested it and decided to launch with it anyway and showed it could). We transmit every 20 seconds with a burst of four 213ms transmissions, each 750ms apart, unless we are in low power mode, during which we only transmit twice every 40 seconds. Our callsign is WL9XZE, and more details can be found here Once we got our development boards set up, we bought a USB software-defined radio (SDR) to test that we were able to properly receive data sent from the satellite’s XDL Micro radio. However, we had a lot of difficulty demodulating/decoding our own transmissions. After some digging, we found that the radio we settled on actually uses a non-standard modulation scheme to make it so its transmissions can only be decoded by their radios! Another lesson from engineering once again ingrained in my mind: test early and fail fast! Once we got the right radios set up, we were good to go. Unfortunately this meant that only the two ground stations that we set up ourselves in Providence and Rome would be able to decode the packets from the satellite, since they were also equipped with XDL Micro transceivers. Our way to let others join the mission was to set up a webpage where you can upload the data you receive. We wrote decoder software that will extract the data from the transmission add it to our public data logs. That page can be found here, along with instructions on how to listen to the satellite on your own. Additionally, people can also run the decoder software on their own computers using this code. It truly is amazing how wonderful and supportive the HAM radio community is. We can’t thank you enough for your generosity and support!
At the end of a long day of newly deployed #CubeSat chasing 🛰️, 2 good TLM observations of #EnduroSat and 2 of #EQUiSat. Here's decoded audio from EQUiSat, recorded by #SatNOGS station 6 - Apomahon located in Greece:https://t.co/oEpWdYVMM5@SatNOGS @endurosat @BrownCubeSat pic.twitter.com/Z48WkzI4DE
— Alan B. Johnston (@alanbjohnston) July 13, 2018
EQUiSat 4FSK packets recorded live - audio uploaded to decoder website https://t.co/Q5hfAdsyvx :: Email confirmation of valid decode moments later pic.twitter.com/HZNxeeCQ5w
— Scott Chapman (@scott23192) January 4, 2019
The antenna for EQUiSat’s radio was too long to fit into the CubeSat P-Pod, so we had to solve the challenge of deploying it once in space. While we could have used a telescoping antenna, we didn’t want to risk a mechanical failure; the radio is the only way we can find anything out about what’s going on with the mission, so making sure the antenna deployed correctly was a critical task. We ended up settling on a design where the antenna was coiled to fit on one side of the satellite, held in place by a small piece of nylon string wrapped around nichrome wire that heats up when electricity passed through it. We used Nitinol wire for the antenna material because it is known for retaining its shape. This way, when it springs open, it will be in a straight line to make a good half-wave dipole antenna. Having an antenna without bends is key to maximizing the equivalent power of the radio using a dipole antenna! When it was time to deploy the antenna, all we had to do was run current through the nichrome wire so it would would melt the nylon string and the antenna would spring open! We used PWM to control the power for melting the string, so that we could easily adjust the duty cycle to heat the specific piece of wire just enough so only the string and not the antenna melted. The antenna deployed successfully, which prevented what I think would have been the most disappointing failure mode for the mission, where we never hear anything back from EQUiSat. At least, we assume the antenna deployed. In reality we will never actually know with 100% certainty since we don’t have a camera onboard. It is technically possible that our antenna deploy sensor failed but that the antenna is loud enough that we can still transmit even while it is coiled up.
Testing tentatively final hardware for antenna deployment! pic.twitter.com/MTde4pkFot
— BSE (@BrownCubeSat) March 15, 2017
Everything so far has been talking about how we receive data from the satellite. What about sending data the other way? We have the capability to send commands to EQUiSat in order to echo back a message, reboot, flash on demand, stop flashing, and restart flashing. We also have some commands mandated by the FCC which tell the radio to stop transmitting in case we are interfering with others’ communications. We first tested our uplink abilities by sending an echo command on December 1st, 2018, which you can see in the radio spectrogram picture below!
In a major mission milestone, we succeeded in sending our first uplink command to EQUiSat, at 4:07:35 UTC on 11/27. The first command simply told the satellite to echo the message "ECHOCHOCO" back down to us 😉, but it proved that our radio setup and uplink algorithms work! pic.twitter.com/IsqZilnmaT
— BSE (@BrownCubeSat) December 1, 2018
We’ve also been able to successfully remote reboot the satellite, and command it to start/stop being in FLASH mode. We have been doing this in order to force it into FLASH mode during times where we may be able to get images from the ground of it flashing.
TestingYou rarely get second chances in space, so we had to make sure that we got everything right the first time. In order to test if our code would hold up over a long period of time, we built what we called FlatSat, a hardware copy of the satellite. We connected all components to achieve full functionality, but instead of being put into a chassis, they were spread across a table in our workshop. Having FlatSat allowed us to iterate on our software and run long OS tests while the hardware teams assembled the final satellite. The many logs (gigabytes of text) we gathered from this process allowed us to verify that our code was properly moving the satellite between its many states. We simulated different sensor and voltage inputs to test that the system responded properly, hoping that all our scenarios would add up to something representative enough of the harsh void of space. These included putting FlatSat in a vacuum chamber and leaving it out in the (cold, but not as cold as space admittedly) Providence winter weather for long durations.
Testing the LEDs also had its challenges. For one, the LEDs draw so much power that at first we struggled to find a power source that could handle them! Eventually we just ended up testing using our spare LiFePO4 batteries instead of a wall outlet. Once we got situated we had to make sure to do the testing in a safe manner. Because the LEDs are so bright, no one could be in the room without wearing eclipse-viewing goggles when the LEDs were shining at their max 44,000 lumens.
The LED driver board works!! #AndThenThereWasLight pic.twitter.com/VEbv3LqwvS
— BSE (@BrownCubeSat) November 23, 2015
To test the radio, we first made sure that all of our radio commands could be sent and received between the radio on the satellite and the radio that was to be used in our ground station. We also used a spectrum analyzer to confirm that we were transmitting on the correct frequency, and tested the antenna gain to verify that we should be able to hear it from space.
Setting up our radio testing rig. #DoYouCopy #OverAndOut pic.twitter.com/9XESZhfKxS
— BSE (@BrownCubeSat) November 22, 2015
We also tested the solar panels by shining bright lights on them and simply making sure they charged our batteries. However, it was initially difficult to find bright enough lights, as the panels were built for being lit by the Sun with no atmosphere, which is quite different from a light bulb in a room!
SpaceTesting charging from the solar panels pic.twitter.com/mGDVfR87Tv
— BSE (@BrownCubeSat) December 20, 2017
Once we had the final satellite assembled and tested, we inserted the Remove Before Flight (RBF) pin, which shut off the whole CubeSat. The other way to shut the system off is to hold down a set of roller switches on the satellite. These roller switches are held down while in the launcher rack so that it can’t turn on until after it is in the void. There are four switches in total that disconnect the system in two different ways, so as to be more fault tolerant: two switches disconnect the computer from its Li-ion batteries, and the other two disconnect each of the Li-ion batteries from ground. On March 7th, when EQUiSat was finally placed in the NanoRacks launcher, all four roller switches were pressed down, meaning it was safe to remove the Remove Before Flight pin. Several months later, when EQUiSat was jettisoned from the ISS, the switches were released and the satellite sensed it was in space! After this, it started a timer for 30 minutes and then deployed the antenna to begin transmitting. The 30 minute delay is a NASA rule to ensure that the CubeSats are far away enough from the station and each other before they start operating in order to avoid possible interference. This delay was possible because, while the Lithium Iron Phosphate batteries that power the LEDs were not initially charged, the Li-ion batteries that power the onboard computer were.
EQUiSat passed its fit check with @NanoRacks! Now on to vibe testing 🚀 pic.twitter.com/2R0GNKNvoC
— BSE (@BrownCubeSat) March 7, 2018
Our orbit is very similar to that of the ISS, with the main difference being that we don’t boost ourselves back up like they do. As a result, our altitude is always slowly decaying. Eventually, in 12-18 months, EQUiSat will get low enough to begin to burn up in the Earth’s atmosphere. EQUiSat is at an altitude of almost 400km (248 miles), moving at a velocity of around 7.6km/s (15658 mph), at an inclination (the angle from the equator) of around 51°, and in an almost perfectly circular orbit (our min/max altitudes are not that different). Another fun fact about our orbit is that a Russian satellite, SiriusSat-1, actually passed within 2.9km (1.8 miles) of us in November 2018, which is extremely close in space terms! The awesome Mike Umbricht at Brown discovered this close approach because the two satellites also transmit on similar frequencies and use similar modulation schemes causing us to briefly mistake their communications for ours.
There are two close approaches between EQUiSat and SiriusSat-1 after midnight. The first is 4.6 km apart over the north Atlantic and another at 2.9 km shown over Antarctica. pic.twitter.com/RaEL5ZOQOT
— ~mikeu (@W9GYR) November 5, 2018
In the last few months of 2018 the satellite temporarily stopped flashing, due to a bout of low sunlight. The angle of the satellite’s orbit relative to the Sun is an indication of how much time EQUiSat spends in the Sun or in the shadow of the Earth. This angle changes over time, and so our CubeSat goes through periods of high and low sun exposure. This change in sun exposure affects the rate at which we can charge the batteries and the temperature of the satellite. This angle changes over time (on the order of weeks) because of irregularities in the Earth’s gravitational field, which are themselves caused by the imperfections in the spherical shape of the planet. For some more details, see this excellent blog post by the curator of the Brown Ladd Observatory.
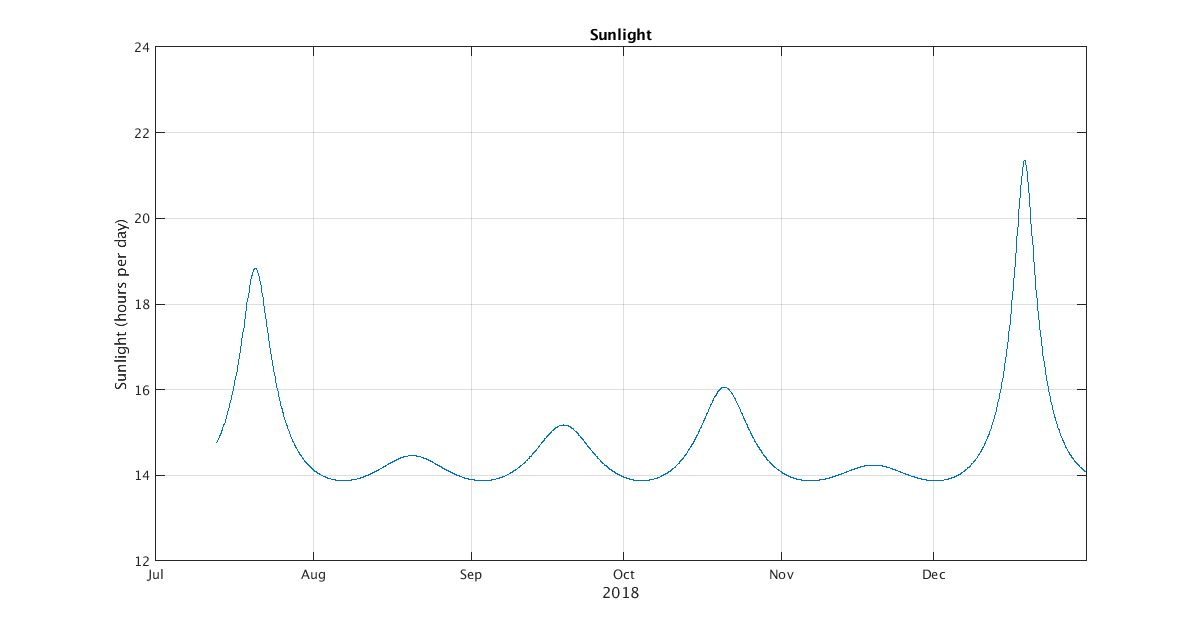
Plot of daily sunlight hours for the first six months of the mission. Image from the Mike Umbricht's blog post.
As you can see, we were in a low sunlight season for the last few months of 2018. This changed in December 2018, however, and since then, we’ve gotten radio confirmation that we’ve started flashing again!
You can keep up to date with our progress on our Twitter. Once again I highly recommend taking a look at our website where you can find pages with more info on our various subsystems and even inspect the most recent radio transmissions and historical data we’ve been receiving from EQUiSat!